Server hard drive upgrade due to start tomorrow morning.

2TB WD hdd


Starting tomorrow morning, 30 Aug 2014, I will be starting the storage drive upgrade to 2TB.  I will be suspending all backup scripts during  this upgrade, which I will be completed within the week, barring unforseen complications.  Usage after the upgrade will be  rather transparent.  This will also allow for more storage space and some ‘relocation’ of things from / and /home utilizing some symbolic links.  Server usage for during  the upgrade, should continue as normal, except for a very short period right at the end when the drives are swapped in the bays.  I would not expect noticeable delays for ftp and web requests during the cloning process.  SSH use might be a little slower than usual, though.  I will try to keep everyone posted about the status of the upgrade operation in comments to this post.  Thanks to everybody for their patience during this necessary

Cloning directories and files.

Well, now that I’ve gone over preparing the new 2TB /dev/sdc1, I will go over cloning the contents of the 1TB /dev/sdb1 to /dev/sdc1.  It is easy, since /dev/sdb1 (/mnt/storage/) has just one large partition.  So, I wish to copy those directories and files over to /dev/sdc1 (/mnt/disk1), while preserving ownership, permissions, and filestamps.

First you MUST become root user.

$ cp -rp /mnt/storage/* /mnt/disk1/

It means: copy everything recursively, while preserving file attributes from /mnt/storage/ to /mnt/disk1/.  😉

Since the 1TB drive is fairly full, this will take some time to complete, but the nice part is that the server’s operation isn’t interrupted.  After the task completes, I shall unmount both drives.  Then, remove the 1TB drive, move the 2TB drive from its present bay to the (now) empty  bay, and reinstall the backup drive into its original bay.  Remount the drives, and everything is back in order.  Since the stream is ‘using’ the 1TB drive, I’ll have to temporarily stop it, and restart it when the swap is complete, as well as send a broadcast message to any users that are on the system using ftp or shell processes.

$ wall The /mnt/storage/ drive will be unavailable in five minutes.

This will send the message listed after ‘wall’ to all terminals on the system.

If you have users that ignore the broadcast, you will have to kick them out, but I will cover that at a later date, if I remember.

Impending hard drive upgrade and howto for the server.

Well, this weekend, I am planning on upgrading the 1TB storage drive on the server to a 2TB drive.  I now already have a 2TB backup drive, and the storage and backup drives are in ‘hot swap’ SATA bays, so it will be fairly easy…. So, I thought I would go over the steps required.  (There aren’t that many.)

First, become root user!

Step #1 : Partition the new disk using fdisk command

Following command will list all detected hard disks:

# fdisk -l | grep '^Disk'

Output:

Disk /dev/sda: 200.0 GB, 200049647616 bytes
Disk identifier: 0xe88de88d
Disk /dev/sdc: 2000.4 GB, 2000398934016 bytes
Disk identifier: 0xa982b1a3
Disk /dev/sdb: 1000.2 GB, 1000204886016 bytes
Disk identifier: 0x5f09e44e

You may see a few lines like /dev/dm-x: .  I have snipped them out as they are from LVM and of no concern. The disk identifier lines can also be ignored.

To partition the disk – /dev/sdc, enter:

# fdisk /dev/sdc

The basic fdisk commands you need are:

  • m – print help
  • p – print the partition table
  • n – create a new partition
  • d – delete a partition
  • q – quit without saving changes
  • w – write the new partition table and exit

Step#2 : Format the new disk using mkfs.ext4 command

To format Linux partitions using ext2fs on the new disk:

# mkfs.ext4 /dev/sdc1

(I chose the ext4 filesystem, because it’s a journaling filesystem.)

Step#3 : Mount the new disk using mount command

First create a mount point /disk1 and use mount command to mount /dev/sdc1, enter:

# mkdir /mnt/disk1
# mount /dev/sdc1 /mnt/disk1
# df -H

(I will create /mnt/disk1 as a temporary ‘landing zone’,  since I shall be ‘cloning’ /dev/sdb1 to /dev/sdc1 —  I will go over that easy command in the next post covering this.)

Step#4 : Update /etc/fstab file

Open /etc/fstab file, enter:

# nano /etc/fstab

Append as follows:

/dev/sdb1  /mnt/disk1   ext4   defaults    1 2

Save and close the file.

(You can use vi instead of nano, but I prefer the feel of nano as it’s almost identical to pico.  Guess I’ve dated myself, heh)

I will cover the directory and file cloning in a day or so.


Installed UPS software and signalling cable on server

CRAB-UPS

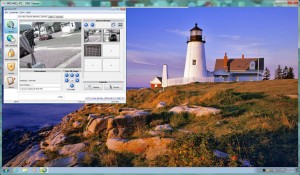
Well, when I replaced the server’s UPS batteries,  I noticed that when I upgraded the hardware in late 2010, I must have forgotten to set up the UPS software.  So, I dug out a UPS printer cable, attached that between the server and the UPS, and used yum extender (since the server is Fedora) to install apcupsd, apcupsd-cgi, and apcupsd-gui.  The screenshot shows apcupsd-gui running.  For those of you that are interested in compiling apcupsd from source code, I will try to add a comment to this post in a day or so.  😉

Tech, music, and general ramblings…..