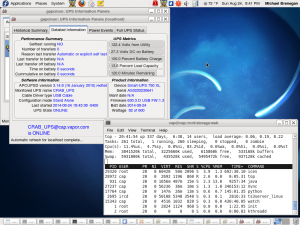
Well, when I replaced the server’s UPS batteries, I noticed that when I upgraded the hardware in late 2010, I must have forgotten to set up the UPS software. So, I dug out a UPS printer cable, attached that between the server and the UPS, and used yum extender (since the server is Fedora) to install apcupsd, apcupsd-cgi, and apcupsd-gui. The screenshot shows apcupsd-gui running. For those of you that are interested in compiling apcupsd from source code, I will try to add a comment to this post in a day or so. 😉
One thought on “Installed UPS software and signalling cable on server”
Leave a Reply
You must be logged in to post a comment.


Here are the instructions if you prefer to hand compile apcupsd.
First, download the tarball. It is found here: http://www.apcupsd.org Connect the ups via USB cable. Then do:
$ lsusb (to make sure that it is 'seen' by your linux box.) Following is how to compile/configure the daemon…..
$ tar -xzvpf apcupsd*.tar.gz
$ cd apcupsd(version)
$ ./configure –enable-usb
$ make
$ make install (as root user)
To be able to run it you need to set some config files. In /etc/default/apcupsd set
ISCONFIGURED=yes
In /etc/apcupsd/apcupsd.conf:
UPSCABLE usb (default: smart)
UPSTYPE usb (default: apcsmart) DEVICE (default: /dev/ttyS0)
Before you start the daemon, run apctest to fully test the UPS, as well as to calibrate the batteries, etc. Start the daemon and you’re in business:
$ /etc/init.d/apcupsd start
or
$ service apcupsd start
Optionally, you can also install apcupsd-cgi, in order to get some nice cgi scripts for viewing your apc status in a web browser like this: cap.vapor.com/ups/multimon.cgi