Category Archives: Computer

How to install VPN on a router

I was talking with a former colleague of mine a week or so ago that I worked with for 21 years. Since we are both Engineers, many times, our discussions contain tech ramblings of one sort or another.  This time, we chatted a little bit about routers and putting a VPN on them to protect multiple devices at a time.

The VPN currently in the #1 spot, is NordVPN. (For many reasons, including a no logs policy.) I also remembered that a few of my friends actually had to get Nord’s assistance to get it all set up on their router.  Usually, that ability resides with the more expensive routers, and usually not allowed on things like the Arris routers that you get from your cable or fiber ISP.

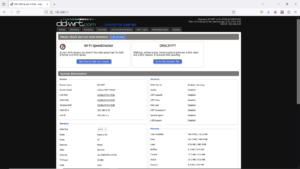
But, there is another, cheaper alternative, as long as you have a supported router.  This is one reason that I’m fairly partial to Linksys (Cisco) routers, ever since my first 4 port wired router, and my first 4 port wiress router. I have WRT54G, WRT54GL, WRT1200ac, and WRT1900ac routers.  I flash them with the DD-WRT firmware. DD-WRT unlocks a lot of features, making a somewhat cheap router perform like one that is much more expensive.  (Sometimes $500 – $600 or more.) I think at one time, I was buying WRT54GL routers new on amazon for 50 bucks.  But the 1200 and 1900 routers were selling for $200 and $300 respectively.  Good news is that you can find them each on ebay for around 40 bucks now. 😉 (BTW: you can click a couple times on the supplied graphics to help you see better.)

This post won’t go over flashing (maybe later) your router, as you can get help on that from dd-wrt, or youtube. Once you have flashed your router, the interface is fairly similar, no matter which router you have.

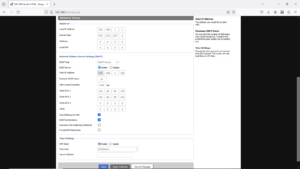
In order to get  NordVPN on dd-wrt, the first thing to do is to go to Setup>Basic Setup in the interface. Under Network Address Server Settings (DHCP), set the following:

Static DNS 1: 103.86.96.100
Static DNS 2: 103.86.99.100
Static DNS 3: 0.0.0.0 (default)
Use DNSMasq for DHCP: Checked     (If you have this)
Use DNSMasq for DNS: Checked
DHCP-Authoritative: Checked     Then, Save and Apply

Next, head over to Setup>IPV6 and make sure it’s disabled.  If you have this enabled, your actual IP address can potentially leak out and defeat the advantage of using a VPN.

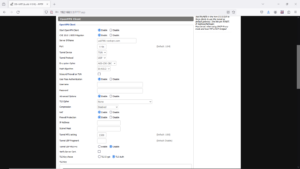
Next, you’ll want to go to Services>VPN.  Under OpenVPN Client, set Start OpenVPN Client to Enable, and you will then see the configuration options.  You will need to set the Server IP/Name.  If  using Nord, you can go to https://nordvpn.com/servers/tools/  to get a suggestion as to the best server. Then, click on show available protocols, and download the UDP or TCP config file.  (I use the UDP on my routers.) You will need this file in a little bit. You will want to also set the following values:

Port: 1194 (or 443 for the TCP protocol)
Tunnel Device: TUN
Tunnel Protocol: UDP (or TCP)
Encryption Cipher: AES-256-CBC
Hash Algorithm: SHA-512
User Pass Authentication: Enable
Username, Password: Your NordVPN service credentials
(The encrypted versions) You get these from logging into Nord, then going to: https://my.nordaccount.com/dashboard/nordvpn/  Then, go to the bottom and click on Set up NordVPN Manually. It is there that you will find the encrypted user name and password. You will want to copy/paste them into the appropriate blocks on DD-WRT. Set Advanced Options to Enable to allow you to set the following:

TLS Cipher: None
LZO Compression: Disable
NAT: Enable

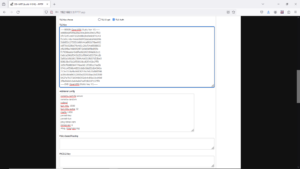
In the Additional Config box, put these commands:

remote-cert-tls server
remote-random
nobind
tun-mtu 1500
tun-mtu-extra 32
mssfix 1450
persist-key
persist-tun
ping-timer-rem
reneg-sec 0
#log /tmp/vpn.log

Then, open the UDP (or TCP) config file that you downloaded into a text editor. Look for the section that has these two lines:

—– Begin OpenVPN Static Key V1—–

—–End OpenVPN Static Key V1—–

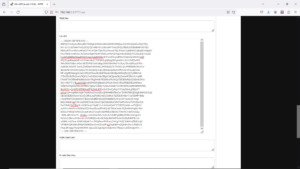
You will need to copy/paste everything in between those two lines, as well as both of the above lines into the block TLS Key, as in the above pic.  Then, you will need to find the section that has:

—–Begin Certificate—– and—–End Certificate—–

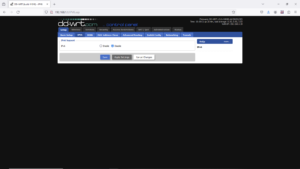
Copy/Paste everything in between those two lines, as well as those to lines into the CA Cert block as in the graphic to the left. After all that is entered, you need to click Save, then Apply Settings. To verify that the VPN is working, navigate to Status > OpenVPN. Under State, you should see the message “Client: CONNECTED SUCCESS“.

Now, everything that connects to that router, either by wire or wirelessly will be protected under NordVPN.  😉


Security images pruning

Well, I have been procrastinating about this.  My security videos get saved on the linux security server, and are limited to a month or so.  Daily, those sql event images get combined into an .avi video and saved locally and sent via ftp to my main server.  They DO pile up, though, as evidenced by the image on the right.  1.2TB.  They have been saving since 12 Apr 2018, when I added that feature to the script that I wrote that created the video files from the sql images.  The reason I did that was that it made it easier to review and archive the security alerts.  Hand deleting all those directories would be a major pain in the ass.  Enter this command:  😉

[root@cap Cameras]# find -mtime +365 -exec rm -R {} \;

It took a short while to parse through all the directories, but, eventually it finished. I checked on things with du -h –max-depth=0. The max-depth argument will stop all the sub directories from printing to the screen.  The results are in the image below.  436GB.  That’s quite a bit of space saved.  Now, instead of directory saved images dating back to 2018, there is only one year.  While the find/rm command above is suitable to enter directly into a terminal and have it operate on the current directory, it is rather dangerous to use.  Far better to schedule a potentially dangerous command in the cron.  First step, is to create the command.  In order to do that, as root do: nano /sbin/shear , or the name you choose to use.  I chose shear.  Add this & save: find $1 -mtime +365 -exec rm -R {} \;  If you have sharp eyesight, you will notice that I inserted $1 after find.  This is a command variable.  Last part of creating the command will be to make it executable by root, and not even readable by other users.  Do this  as root to do that; chmod 700 /sbin/shear.  Of course, if you can’t use root directly on your system, then use sudo.  Now, you can directly use the command that you created as:

# shear /path/to/directory/you/wish/. (/sbin/ should be in your path. If you saved it elsewhere not in your path,  </path/shear>) 😉

Final step is to create a crontab entry to run it monthly or so.  crontab -e will allow you to edit your crontab,  Of course, you might have to do sudo crontab -e if you can’t become root.  If you need help with the syntax: cat /etc/crontab.  I also have the MAIL=root commented out, so as not to get emails filling up root’s email box.  Then, restart crond.  That’s it.  If anybody needs a review of crontab and how to use systemctl to restart crond, either reach out to me, or just add a comment, and I’ll create a little tutorial. 😉

Arcade Update 2.59-2.61

Seems that I always forget one or two things when I roll out an update.  Update 2.58-2.59 was no exception.  I had wanted to make the update script automatically choose whether to run the external hard drive or console update paths.  Now, it does.  Along with one or two other minor things.  While I was working on that, I discovered that about 17 of the Visual Pinball tables did not properly display on the console. This problem didn’t occur on the ext. hard drive installation.  Probably due to the fact that the CPU and gfx on the console are Intel 2nd generation, and Windows 10 wasn’t fully supported until 3rd generation. So, I created a second games list, Games-Console that is only the tables that display on the console, and the Games list is the full VP games list.  An example of the way the VP tables that don’t properly display is on the left.  Totally unplayable.  Since all the tables properly display on my Elitebook laptop with NVIDIA gfx, I felt that the proper solution would be to keep them, so that’s why I created the Console games list. That all being said, I must again remind everybody that updates HAVE to be applied in numerical order, or you shall probably break things.  If in doubt, check your version.

Update 2.59-2.61 is HERE.

Previous update blog posts are below:

Update 2.58-2.59 is HERE.

Update 2.56-2.58 is HERE.

FOUR updates (2.40-2.46, 2.46-2.48, 2.48-2.51, and 2.51-2.56) are HERE.

Bit of news here, in closing:  JRod has ordered a spinner for adding to the Tankstick for games like Tempest, Arkanoid, and many others.  I shall let you all know how it goes….


Visual Pinball Arcade Update 2.58 to 2.59

Okay, this is the update that a few of you like Dan have been anxiously waiting for.  🙂

This will add Visual Pinball 9.x.x tables under Maximus Arcade as well as a few bug fixes.  As always, I seem to have forgotten something on my ‘to do’ list. (The ability to just do backups from the loader)  Oh well, I’ll get to it next time.  Free lifetime updates mean that sometimes things get forgotten, lol.  This update is a fairly sizable update.  The archive is about 830 MB, and you will want at least 3GB free on the usb flash key that you use to run the update.

The first thing that you all will notice (for those that auto load right into MAME, or those that have multiple emulators configured), that you will be faced with either MAME or Visual Pinball.  So, if you lost configured emulators, or don’t want the VP choice, you will need to go into MA preferences, by hitting Ctrl-P, and then choosing the Display Order tab to set it up as you wish.

After running the update, you will most probably want to set the display preferences of Visual Pinball as the readme guidelines, or else it won’t be fullscreen and will instead run in a window.  In my opinion, that is a less appealing experience.   As you see on the right, is an example of a VP pinball table running full screen. You may also wish to change some of the default keys to other keys o your choice.  For example, the left and right flippers are left and right shift keys.  That may not work for you, and can be changed.

As always, make sure to read the WhatNew text file through at least one time, as well as read it again when the update .bat file loads it.  Also, pay careful attention to the instructions that appear on the screen while the update is running.  At one point, you will have to change the install path to VP, or it will not properly work. 

Okay, click HERE for the 2.58-2.59 update archive.

If you have any issues, don’t hesitate to reach out to me, and I’ll do my best to assist you with your problems. 😉

Now, on to a little bit of news.  RecRoomMasters (maker of the best arcade cabinet kit I ever found) has gone out of business.  For those of you that bought one, I guess your lifetime warranty just ended.  For those of you that procrastinated, and never bought one, you still have hope.  There are other avenues.

A two joystick tankstick with trackball is still available HERE.

A ‘drop in’ spinner control is still available HERE.  (For games like Tempest.)

A full sized ‘naked’ FULLY ASSEMBLED cabinet is HERE. I think it’s a bit more than RecRoomMasters, but it’s assembled.  I think they used to sell these with 250 games, but it may just be the cabinet now.  Email them for details.

Another place that looks pretty cool is the Arcade Guys. Click HERE.

Well, everybody, that gives you a few links in the light of RecRoom Masters demise.  I recommend the tankstick whether you are building a full size arcade cabinet, or if you are just using a console attached to a huge flatscreen TV.  Good quality, and I believe it has a lifetime warranty.

Hard to believe that this arcade console/cabinet has been an ongoing project for 7 years now.  Started with MAME 149, now has MAME 225.  I continue to fix reported bugs (or attempt to, lol), as well as feature additions, so keep your eyes on this blog.  So much easier to do one or two updates at a time.  (Remember, the updates ALWAYS have to be performed in order.)