
Xenon 4.0 was released a couple days ago. I’ve installed it on an android tablet and android box with no issues encountered so far. As always, the setup skin requires a bit of patience. Fen Light is installed by default, and if you don’t use it, try it. You just may like it. I have it set to not auto play, but to let me accept the source. I also set it to preload the next episode, and that really saves time when binge watching a season. If you watch sports, you will want to add The Loop and Mad Titan. As always, don’t forget to authorize your Trakt. Same for your Real-Debrid, it that’s what you use. Additionally, you could install the Elementum and Elementum Burst addons. But, I will caution you to always run Xenon behind a VPN. You have been warned!! I will also suggest that you backup your build in case anything goes wrong down the line. You do that under Omega Wizard>Maintenance>Backup Build. I always name mine backup, so the next one just over writes the last one so they don’t pile up. 😉 Takes 10 or 15 minutes to backup, so go have an adult beverage. Another notable thing to mention is the IVue TV Guide is gone as it was pretty difficult to configure, and most people struggle with time zone setting. Use instead TV Guide (PVR) from the small menu on the TV Guide tab. All in all, this is a pretty nice and stable update, worth the time to install it.
Category Archives: VPN
How to install VPN on a router
I was talking with a former colleague of mine a week or so ago that I worked with for 21 years. Since we are both Engineers, many times, our discussions contain tech ramblings of one sort or another. This time, we chatted a little bit about routers and putting a VPN on them to protect multiple devices at a time.
The VPN currently in the #1 spot, is NordVPN. (For many reasons, including a no logs policy.) I also remembered that a few of my friends actually had to get Nord’s assistance to get it all set up on their router. Usually, that ability resides with the more expensive routers, and usually not allowed on things like the Arris routers that you get from your cable or fiber ISP.
But, there is another, cheaper alternative, as long as you have a supported router. This is one reason that I’m fairly partial to Linksys (Cisco) routers, ever since my first 4 port wired router, and my first 4 port wiress router. I have WRT54G, WRT54GL, WRT1200ac, and WRT1900ac routers. I flash them with the DD-WRT firmware. DD-WRT unlocks a lot of features, making 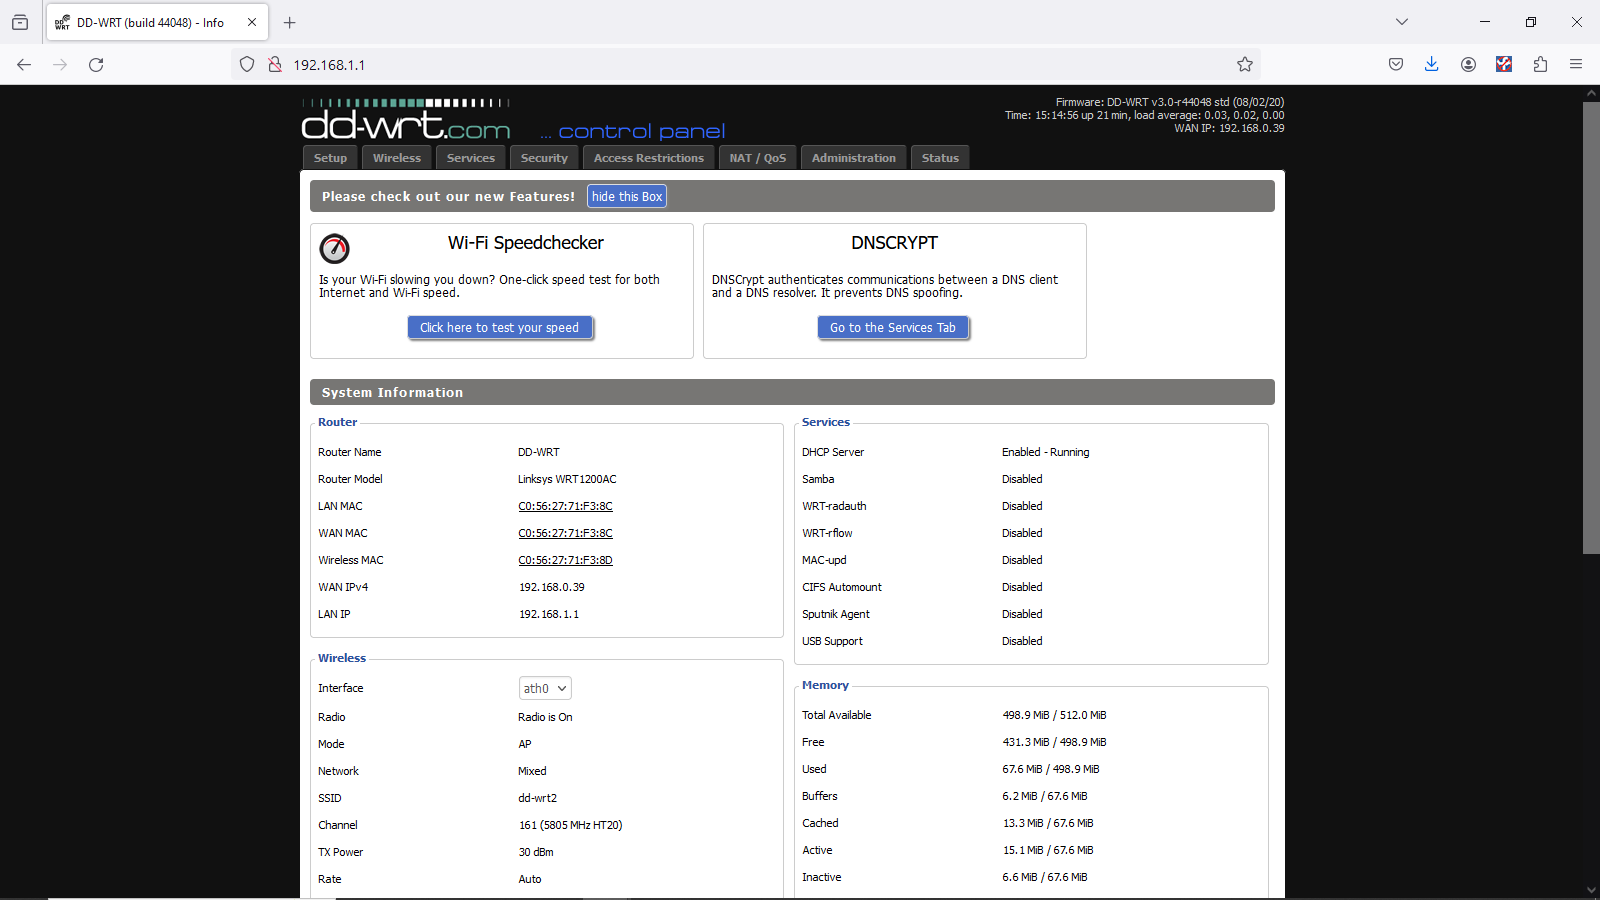 a somewhat cheap router perform like one that is much more expensive. (Sometimes $500 – $600 or more.) I think at one time, I was buying WRT54GL routers new on amazon for 50 bucks. But the 1200 and 1900 routers were selling for $200 and $300 respectively. Good news is that you can find them each on ebay for around 40 bucks now. 😉 (BTW: you can click a couple times on the supplied graphics to help you see better.)
This post won’t go over flashing (maybe later) your router, as you can get help on that from dd-wrt, or youtube. Once you have flashed your router, the interface is fairly similar, no matter which router you have.
In order to get NordVPN on dd-wrt, the first thing to do is to go to Setup>Basic Setup in the interface. Under Network Address Server Settings (DHCP), set the following: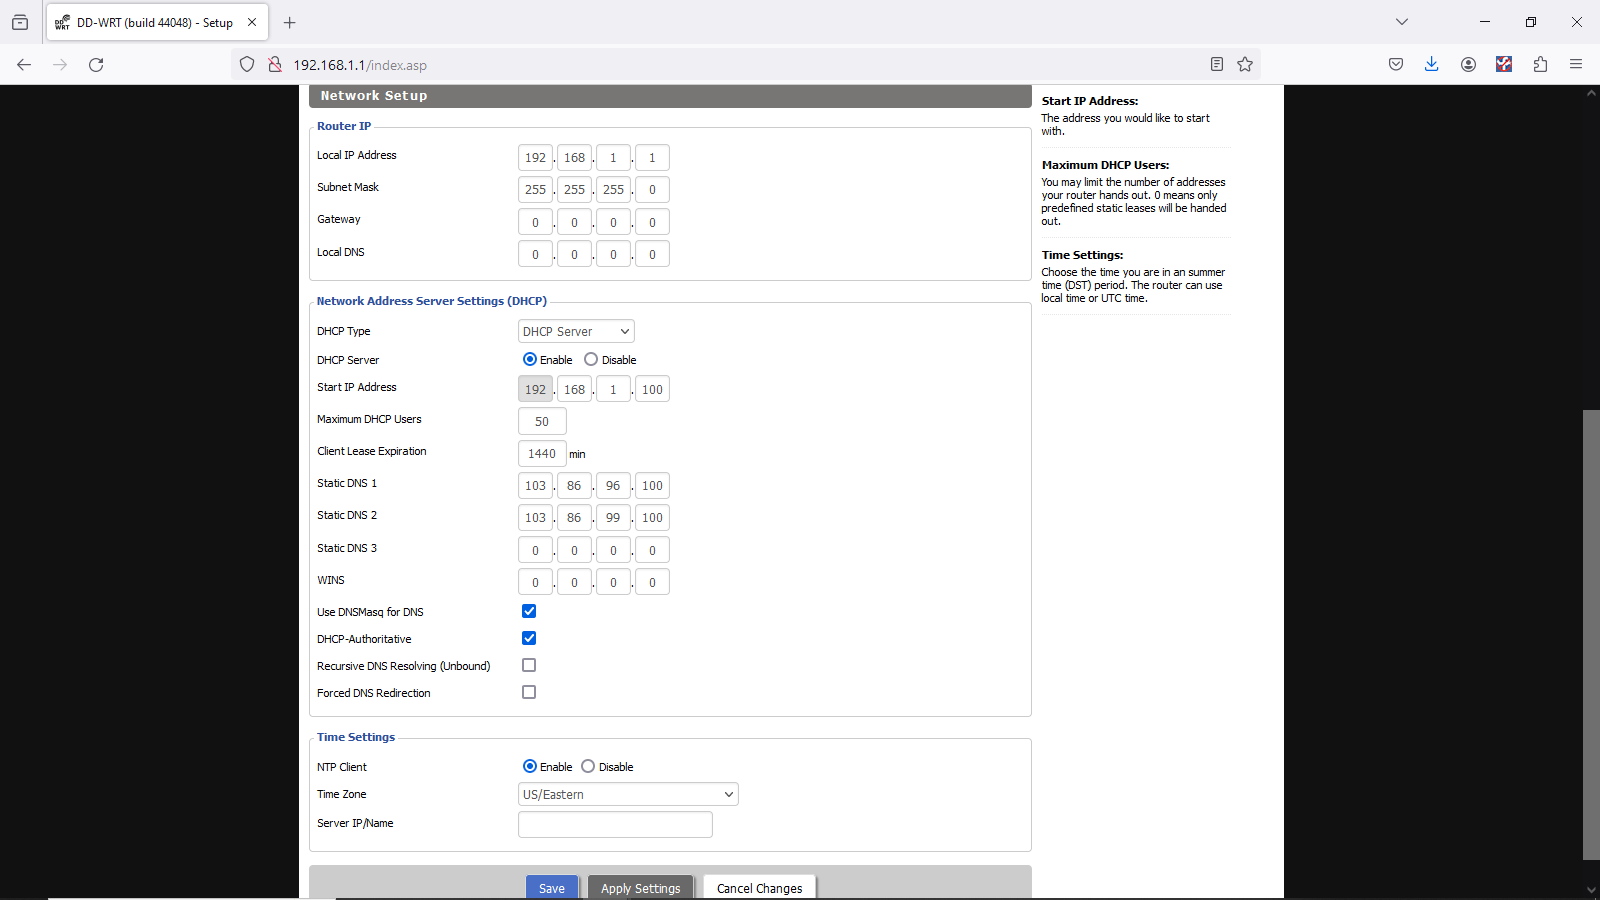
Static DNS 1: 103.86.96.100
Static DNS 2: 103.86.99.100
Static DNS 3: 0.0.0.0 (default)
Use DNSMasq for DHCP: Checked (If you have this)
Use DNSMasq for DNS: Checked
DHCP-Authoritative: Checked Then, Save and Apply
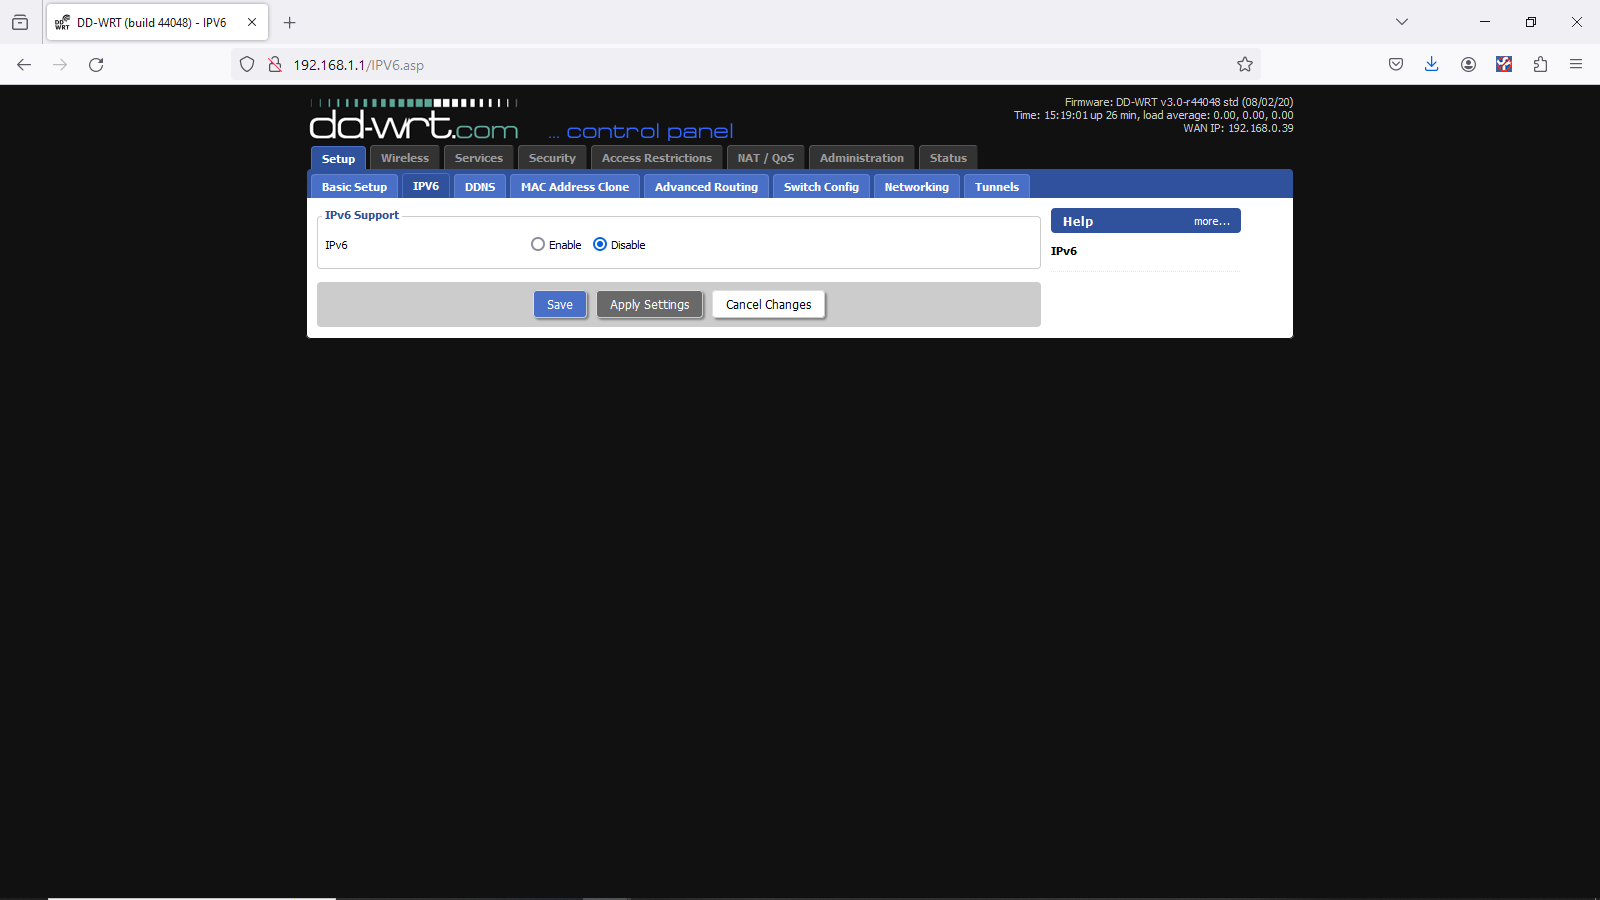 Next, head over to Setup>IPV6 and make sure it’s disabled. If you have this enabled, your actual IP address can potentially leak out and defeat the advantage of using a VPN.
Next, you’ll want to go to Services>VPN. Under OpenVPN Client, set Start OpenVPN Client to Enable, and you will then see the configuration options. You will need to set the Server IP/Name. If using Nord, you can go to https://nordvpn.com/servers/tools/ to get a suggestion as to the best server. Then, click on show available protocols, and download the UDP or TCP config file. (I use the UDP on my routers.) You will need this file in a little bit. You will want to also set the following values:
Port: 1194 (or 443 for the TCP protocol)
Tunnel Device: TUN
Tunnel Protocol: UDP (or TCP)
Encryption Cipher: AES-256-CBC
Hash Algorithm: SHA-512
User Pass Authentication: Enable
Username, Password: Your NordVPN service credentials
(The encrypted versions) You get these from logging into Nord, then going to: https://my.nordaccount.com/dashboard/nordvpn/ Then, 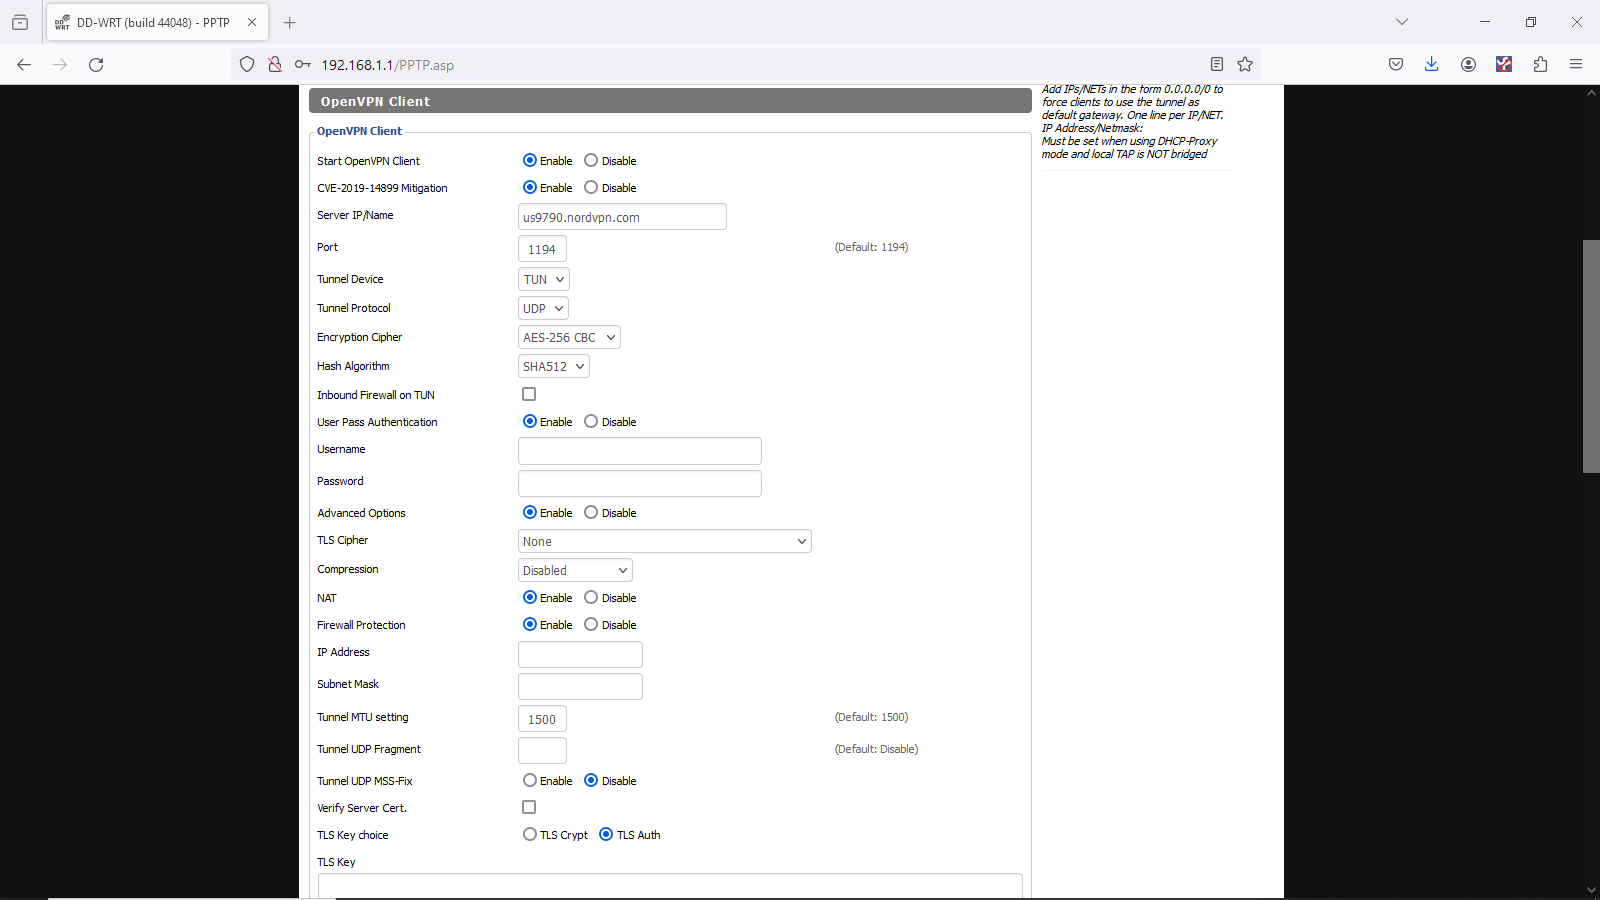 go to the bottom and click on Set up NordVPN Manually. It is there that you will find the encrypted user name and password. You will want to copy/paste them into the appropriate blocks on DD-WRT. Set Advanced Options to Enable to allow you to set the following:
TLS Cipher: None
LZO Compression: Disable
NAT: Enable
In the Additional Config box, put these commands:
remote-cert-tls server
remote-random
nobind
tun-mtu 1500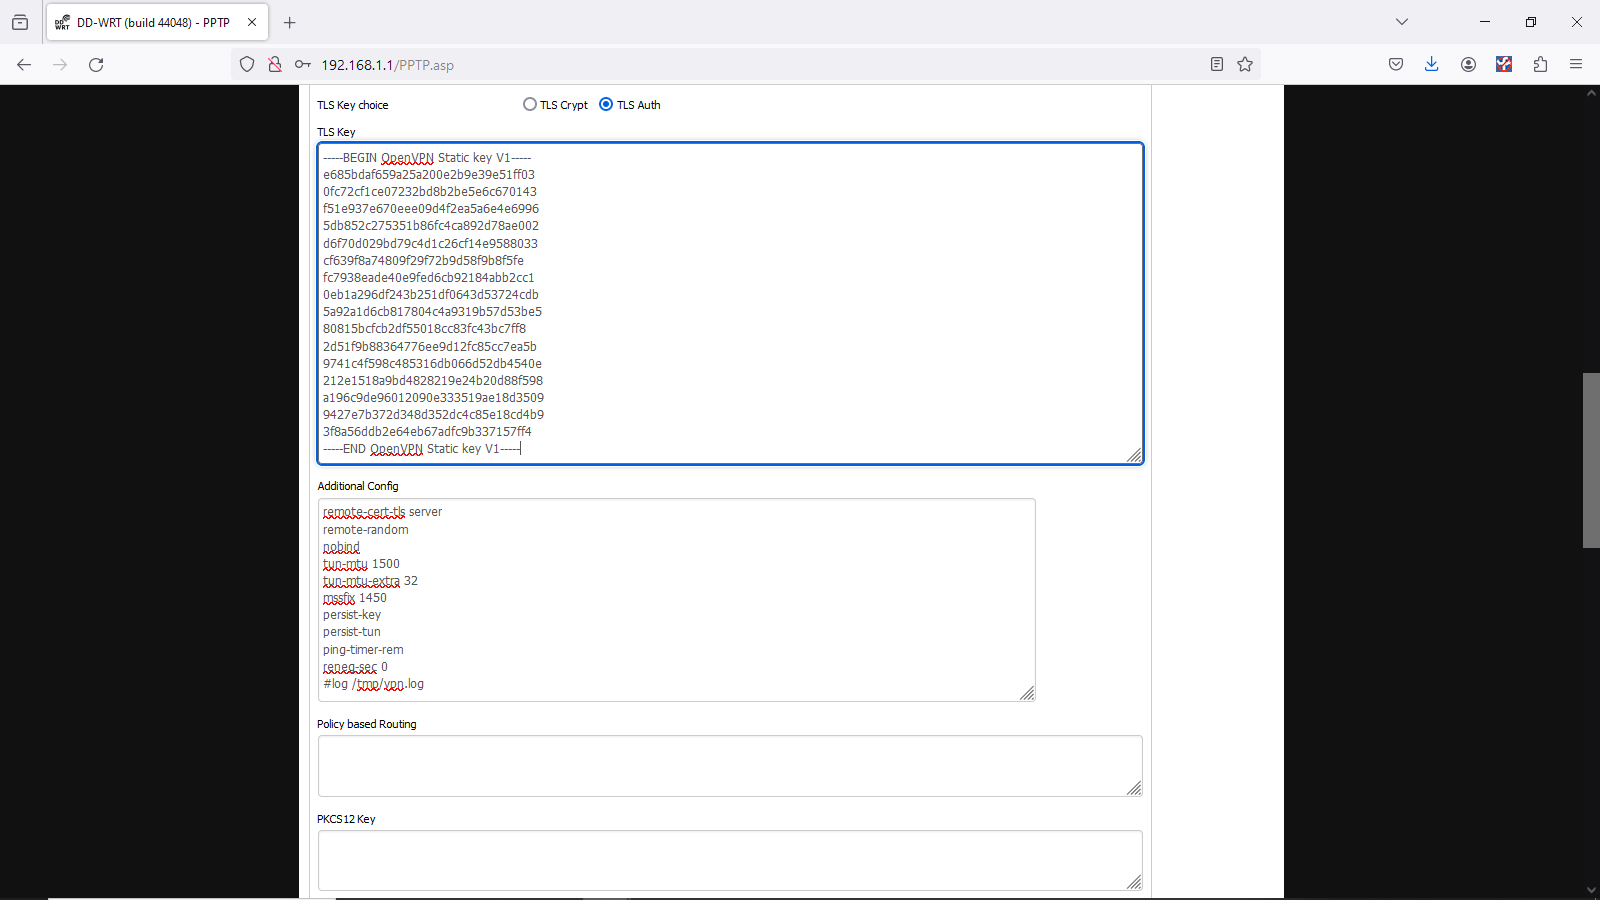
tun-mtu-extra 32
mssfix 1450
persist-key
persist-tun
ping-timer-rem
reneg-sec 0
#log /tmp/vpn.log
Then, open the UDP (or TCP) config file that you downloaded into a text editor. Look for the section that has these two lines:
—– Begin OpenVPN Static Key V1—–
—–End OpenVPN Static Key V1—–
You will need to copy/paste everything in between those two lines, as well as both of the above lines into the block TLS Key, as in the above pic. Then, you will need to find the section that has:
—–Begin Certificate—– and—–End Certificate—–
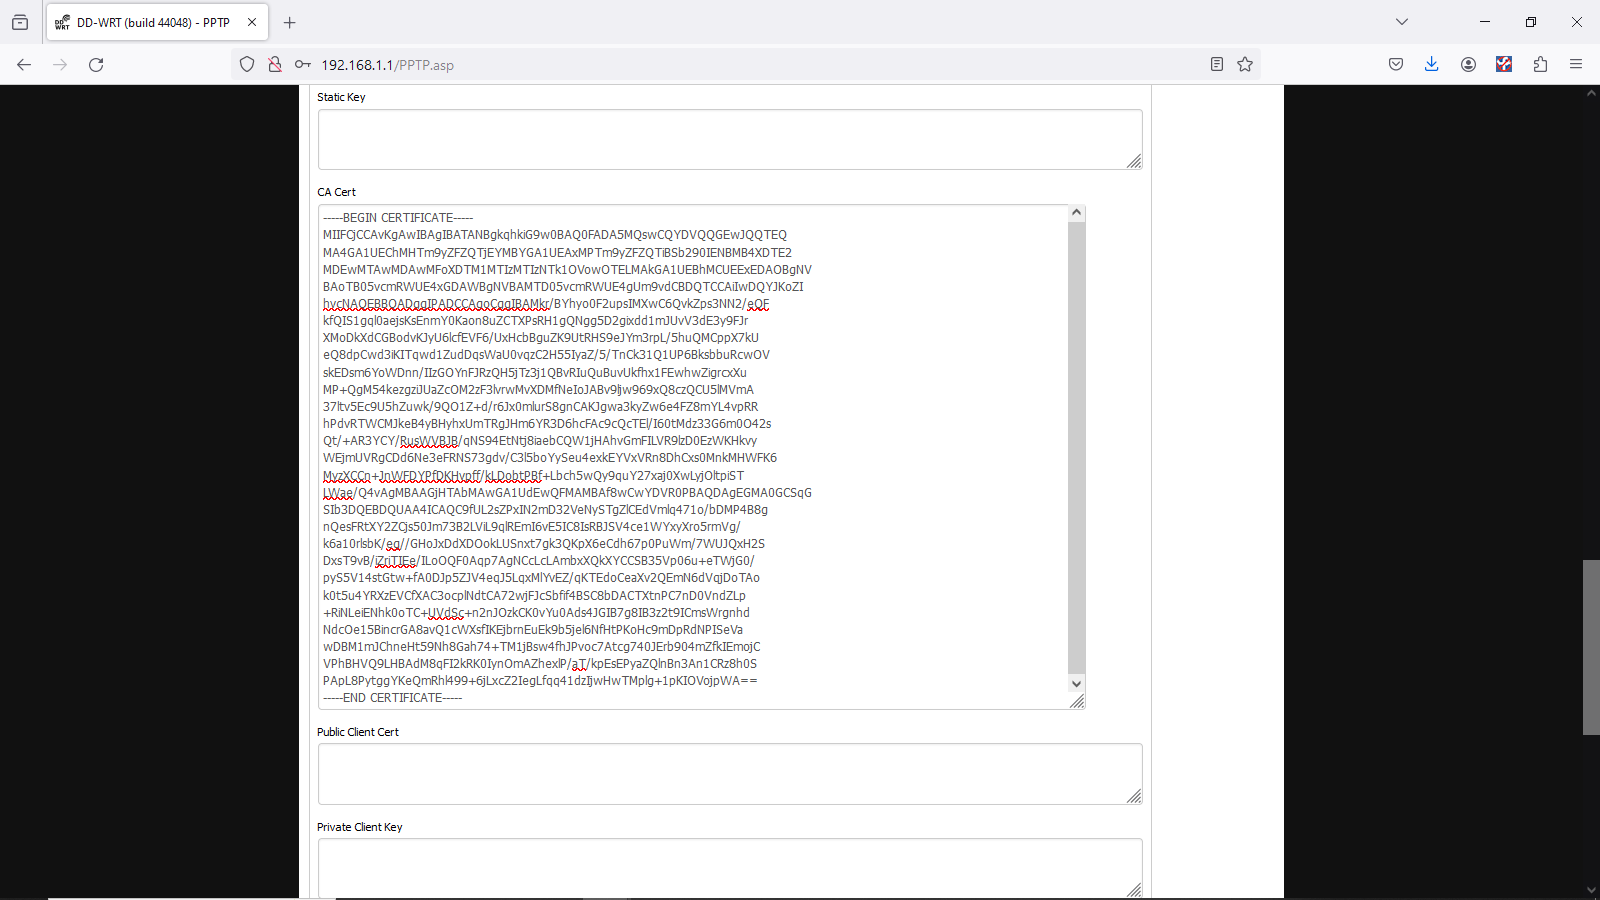 Copy/Paste everything in between those two lines, as well as those to lines into the CA Cert block as in the graphic to the left. After all that is entered, you need to click Save, then Apply Settings. To verify that the VPN is working, navigate to Status > OpenVPN. Under State, you should see the message “Client: CONNECTED SUCCESS“.
Now, everything that connects to that router, either by wire or wirelessly will be protected under NordVPN. 😉