Category Archives: Computer

Arcade Update 1/2022

Happy New Year!!

This blog post is to release the first four updates of Arcade v2.40, and updating to v.2.56.

Arcade 1.00 was released on Nov. 2015, and was the beginning of the realization of the dream I had for an arcade experience encompassing several different gaming platforms.  This was updated on 6 Feb 2021 to version 2.00, and I managed to get all users updated to this version. (I managed to get all users upgraded to v.2.40 in Mar. 2021.)  I believe it was v.1.30 in Sep 2020 that I added console/arcade cabinet installations as well as the external hard drive version.

I have actually even tested Maximus front end under a recent Fedora Linux distribution using Wine.  I was using a USB Thrustmaster joystick. This was with the external hard drive version, mapped to G: under Wine. If you need a Maximus key, you can find it HERE.  Seems every time I check, it’s always on sale for $9.99.

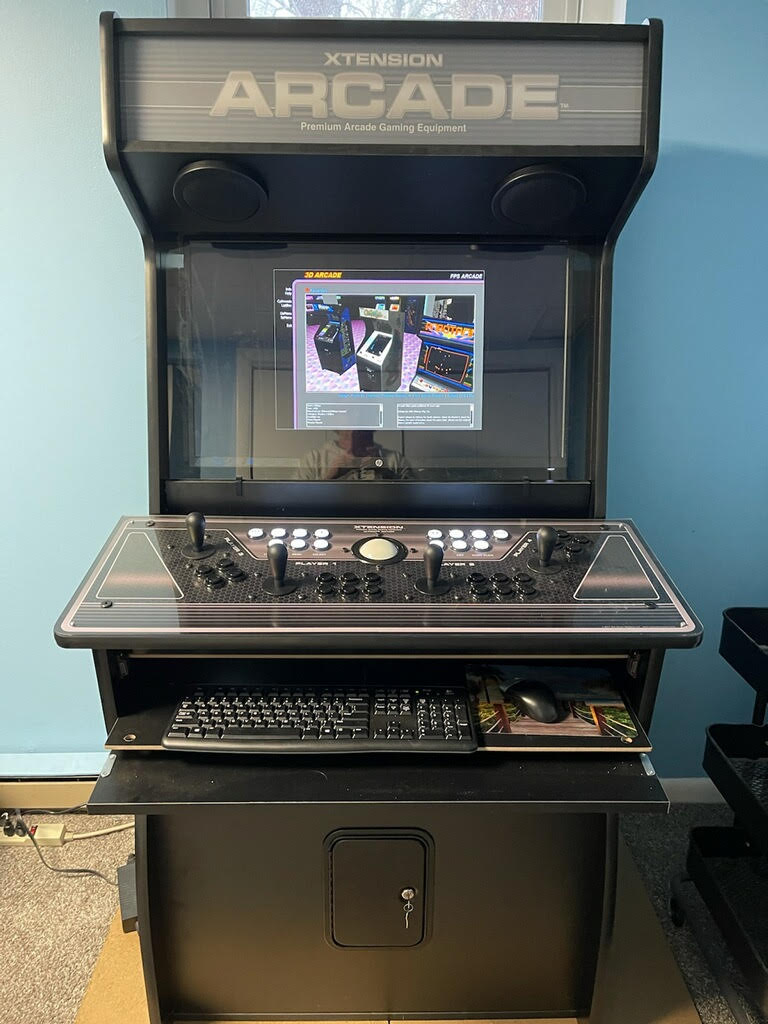
One notable thing to mention, is that besides the Maximus frontend, there is also another one, that I never really configured.  3DArcade.  I have spent  quite a bit of time configuring it.  I have stayed in Arcade>Favorites, if my memory is correct. (Meaning, you run 3DArcade, then click Arcade, then click Favorites.)  3DArcade is a ‘virtual’ experience. If you would like to see a particular cabinet added to that arcade, just give me a shout. 😉

Back in the v.1.xx days, updates were hosted on mega, and emailed out.  Now, since most Arcade users are blog members, I will just post the mega update links here.  Also, the user had to ‘hand update’ the installation.  Now, under the v.2.xx updates, I have created update script .bat files that will do all the work for you!!

First, a little background on how the updates actually work now.  Each update file is a zip within a zip.  You must expand them both.  Then, you should read the ‘README UPDATE.txt’ file, which usually just tells you to run the ArcadeUpdate.bat file by just double clicking it.  If there are any other things that need doing, they will be spelled out here, as well as in the README UPDATE.txt file.  Information on exactly what the update does is found in the WhatNew.txt file.  However each update needs to be done, with none skipped. Update files need to be done in succession.  Meaning, if you have version 2.40, you need to perform update 2.40-2.46 first.  Then, the 2.46-2.48 and so on.  In later versions of the console, it will report the version upon booting.  For the ext hdd version, you would find version.txt in the root G: drive.

I STRONGLY SUGGEST backing up your installation using whatever you use to back up your computer BEFORE attempting an update, in case things go sideways.  You have been warned!!

The Update 2.51-2.56 contains TWO scripts, that MUST be run in order, and the first one needs to be run as administrator.  Otherwise your installation will not work at all.

Okay, what you’ve all been waiting for, here are the links for the update files.  (Clicking on them, will open a new tab.)

Update 2.40-2.46

Update 2.46-2.48

Update 2.48-2.51

Update 2.51-2.56

Snapshots Addon for 2.51-2.56

The Snapshots Addon can be expanded into the snapshots-hold directory under WinUAE on your G: drive by hand, or, copied into that same directory in the update architecture.  (Doing that, will just slow the update down, so be patient, if you do that.)  Or, you can omit that Addon completely, as the end user may not need it.

Another notable addition in the 2.51-2.56 update was a bug reported by Jrod and his brother concerning the fact that certain MAME roms would ‘hang’ upon anticipating a joystick movement.  This was tracked down to the difference between 4 and 8 way joystick mappings.  So, I created some custom mappings for certain problematic games like DigDug, and Ms. Pacman and more.  If anybody has any issues with any particular game, feel free to reach out to me.

If you don’t understand all of this if this is your first update, don’t hesitate to reach out to me via text, email, facebook, or phone.  Keep your eyes on this blog for any future updates…. 😉


Fixing borked AJAX Chat

A little while ago,  both the AJAX Chat servers, the main one on Quackhouse Radio server, as well as the backup on the KRAB radio server crapped out.  I’ll fill you in how I fixed it, as well as the symptom.

The symptom was that if a connected user just closed their browser instead of using the LOGOUT button, the chat server would crash, and the next person to try to log in, would get something like this in their browser:

Query: INSERT INTO `AJAXChat`.ajax_chat_messages( userID, userName, userRole, channel, dateTime, ip, text ) VALUES ( ‘5150515051’, ‘[KRAB]’, ‘4’, ‘0’, NOW(), ‘��’, ‘/logout Cap Timeout’ ); Error-Report: Out of range value for column ‘userID’ at row 1 Error-Code: 1264

Pretty much undecipherable, unless you are a linux sql geek like I am.  😀 The way to get past this would be to use install.php to reinitialize the database tables.  However, the next time a user fails to log out properly, the same thing happens.  Here’s how I fixed the backup server.

It can be done using the command line, but the easiest way is using phpMyAdmin.  So, if you don’t have it, you must install it.  It is set by default to only allow connections from localhost, so keep that in mind.

First thing to do is to either Remove or Rename the AJAXChat database.  Login to phpMyAdmin and click on the AJAXChat database, then select Operations.  Then, either Remove, or Rename it.  I chose to Rename it rather that Remove it.  I can always Remove it later.

Second thing to do, is to add a new user and top level database.  Click on New (on the left), then User Accounts.  Click on Add User Account.  Type the access info you want in the Login information area. (username, host, password.)  FYI, the host should be localhost. 😉  Then click on the radio button for Create database with the same name and grant all privileges.  Then, click Go.

Finally, you need to go to the config.php script in the AJAXChat lib directory,  and open it in your editor.  I prefer to use nano, but you can use ed, vim, or a host of others.  Then, you need to update the config.php.  You will need to update the user, password, and database name that you just set up.

Then, you just need to rerun the install.php, it it will recreate everything automatically.

Now, the only time you should end up with that sql garbage when trying to login to AJAXChat, is if that login is currently logged in…. 😉

That’s it!  With luck, that will take care of your issue.


MAME Arcade Cabinet

Well, my vision of about five years ago has made it to a working machine. A MAME (Multi Arcade Machine Emulator) machine is one that will play all the classic arcade games as long as you have the ROM files.  (You can click on the pics below for larger size ones.)

Here, you see my friend just after  we powered it up for the first time, after mounting the monitor to the top half of the cabinet and installing it on the bottom half.  Then, the computer got installed, and for this first test, we didn’t even have the controller screwed down.  Here, we have just gone into the Robotron 2084 game for a first run.  At this point, we still had to map the controllers for a true experience.  This includes the trackball for games like Missile Command, Arkanoid, Centiped, etc. My friend opted to not install a coin door in the hole in the front, but insted decided on a blank panel….  This Arcade cabinet has all the roms that you might encounter in a true video arcade: Space Invaders, Mario Brothers, Asteroids, and the list goes on and on.  Here, you can see his girlfriend taking Ms Pac Man out for a spin.  This arcade cabinet seems to be a big hit.  I put together an Elite 8200 USDT computer with Windows 10 Pro on it, along with Maximus Arcade front end for MAME.  The computer boots directly into the front end, and you only need to select the game you want to play.  My friend picked up the cabinet and tankstick controller from recroommasters.  You can just google it.  He also had to pick up a 32″ vesa mount display.  (I recommended a VGA input, but he could have used the native DP++, Display Port, or adapt that to HDMI, but a VGA input is easiest.)  There was a bit of initial angst, and my friend noticed the display would occasionally flip upside down, so I just had to disable the intel video driver’s hot keys, as the tankstick emulates keyboard buttons, etc, and was causing this.  Turning the hot keys off fixed that.  Another bit of startup tweaking was the trackball wasn’t being picked up, so I had to go into the mame.ini file and set MOUSE and MULTIPLEMOUSE from 0 to 1.  If you don’t want to go thru the time and expense (not cheap) of setting a cabinet like this up, for the price of a computer, ram and hard drive, you could actually connect to your wide screen TV set, and play the classic arcade games right from your couch.  🙂


Installing MATE

The following is courtesy of:  Sylvia Sanchez:

Like KDE, MATE has its own spin.  But if you want to install it along your current desktop, you can do it following these instructions.

First, update your system using your graphical tool, or use this command:

sudo dnf update

To install everything needed, use this command:

sudo dnf groupinstall mate-desktop

You may want to install Mate related tools as well. You can do that with this command: (recommended)

sudo groupinstall mate-applications

The system will show you the amount to download and the final size once installed.  If you’re okay, type y (or the equivalent for “yes” in your language).  The installation itself is automatic, so you can do other things while packages install if it takes a while. If you use Terminal in a standard Fedora Workstation install, a notification sounds once the command is done.  If you’re using Konsole or other tool, you may want to keep an eye on the process to know when it’s finished.

After installing your new desktop, of course you’ll want to try it. For best results, shut down your system and turn it on again. At the login screen, once you select or provide your user name, the password screen appears. There is a small gear icon which shows you options for desktop environments. Select MATE and then provide your password as usual.

Once you log in, you will find something like this:

Bare Mate Desktop

You can play with the settings to change the appearance as you want.  Anything you want to change is under the System menu which contains three separate items: Preferences, Administration, and Control Center.  If you find this familiar, it isn’t a coincidence. MATE looks exactly the same as Gnome 2, from it was originally forked, and it resembles the Apple OS X style.

Under Preferences you can change GTK colors, styles, desktop themes, and icons.  If you choose Control Center, you’ll launch the main program to tweak MATE. From here you can change everything about its look and feel, but you can also perform administrative tasks like configuring hardware or setting passwords.

Settings Menu and Folders

You can find more info about MATE here at their official website. You can also visit the official Fedora MATE spin website to get an installable MATE image put together by MATE fans and contributors in Fedora.