Category Archives: Computer

Security cameras now running under Fedora Linux (64 bit)

Well, I managed over the past few days to get the security cameras up and running on Fedora 21 Linux 64 bit using Zoneminder.  The cameras were running under WebCamXP under Windows 7 64 bit, but I grew tired of Bill Gates deciding to reboot the server, even though I instructed it not to perform updates.  Microsoft would occasionally decide that it was in my best interest to apply an update automatically, and do a reboot, rather than allowing me to do that.

Click here for some screenshots from the zoneminder site of it in action.  I’m already a fan of it since it’s running under Linux and Zoneminder Montage
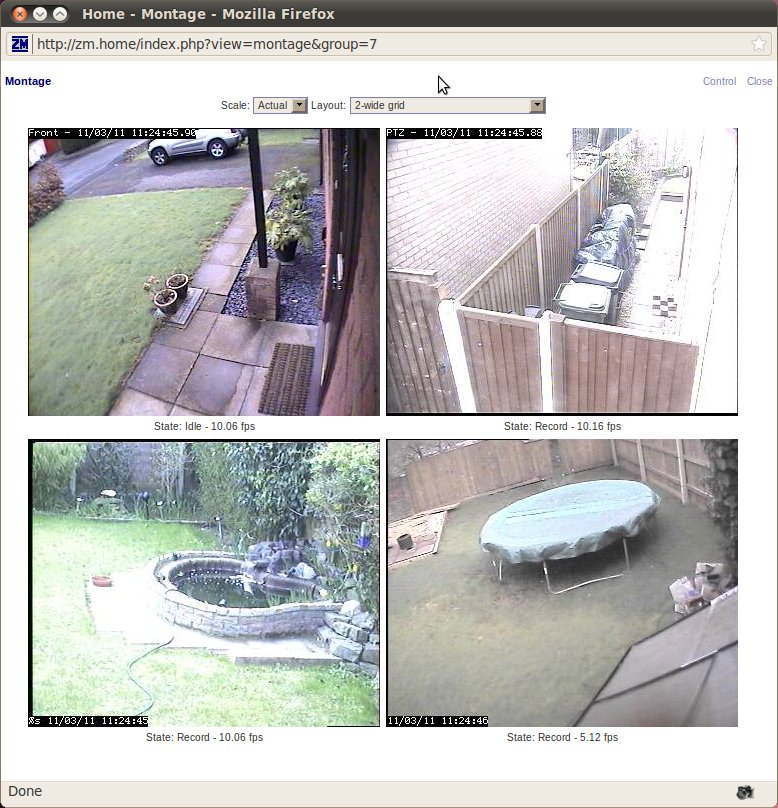
utilizing mysql.  For right now, it’s running ‘in parallel’ to the Win 7 server, to make sure that there aren’t any issues.  In a week or two, I shall finalize the migration.  Another point that would have probably been an issue with running two security servers ‘in parallel’ would have been overloading my wireless network, so I converted everything to ‘wired’ with the two servers in a temporary location to make sure everything is working properly.  I left the wireless access configured for it to use it as a ‘fallback’ in case the wired ethernet fails.  (The picture above is not my actual cameras, btw.)

Another upside to this is that the zoneminder console is far less cpu hungry than its windows counterpart.  It’s running at around 75% to Zoneminder Console
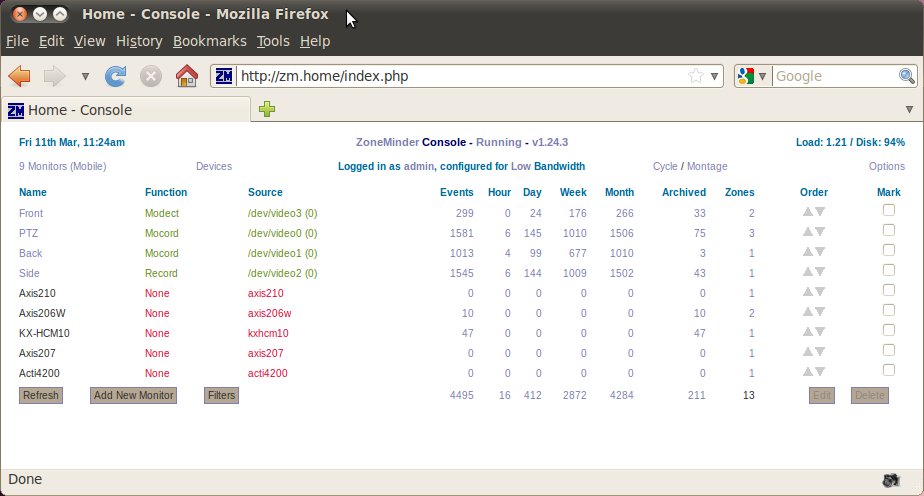
85% cpu free.  For you hardware geeks out there, it’s running Fedora 21 (64 bit) on a compaq (or HP, if you would rather) machine with an Intel i5 quad core 3.10 Ghz cpu with 8 GB of ram.  (I checked, and got similar numbers on Fedora 21 32 bit with 4GB of ram.) (The picture above is not my actual console, or web address.)  (Yes, I have my console password protected.)  If anybody is inclined, and needs help to set things up, just ask, and I’ll be happy to post a tutorial here.  (Since it’s linux-based, its hardware requirements aren’t that high.)

Versatile Bandwidth Monitor

I managed to find a great, free bandwidth monitor tool that is not crippled or limited except for one minor thing that mostly won’t cause grief.  If you need that, then activate it.  😉  It’s called Netbalancer, by seriousbit.  Here is the tray NetBalancerTrayicon.  It actually turns transparent when you move your mouse over it.  It can also be hidden down to the taskbar, where if you double click it, it will lauch the main program task window.  Next is the larger popup that you get when you mouseover the NetBalancerLargerPopupdouble red and green arrows in the task bar, you get what’s on the right.  A bit more information than the smaller one, and as soon as you move your mouse away, it goes back into hiding.  Now, if you double click the little tray icon, you will get the main program window with all the details and controls that you could imagine.NetBalancerMain If you notice if you expand the graphic, it says that the trial period has expired.  It still works, and even asks if you want to upgrade to the latest version.  Been using this for a month or two now, and it’s really slick.  Click here to download the program.  And, click here to go to the main webpage for detailed info.  Enjoy.  I used Bandwidth Monitor Pro for many years, but it didn’t do  half of what this program does.  It would not allow you to throttle bandwidth, or the real deal breaker, it wouldn’t allow you to see WHICH application was using all of your bandwidth.  😉

Server gets larger system drive, and the root LVM extended.

Well, as you all saw in my post on 28 Jan, the root partition only had 29G free, so I felt that an expansion was in order.  The original IDE drive was 200 GB, so only 50 GB was allocated to the root partition.  I ‘cloned’ the existing drive to a new 250GB IDE drive using clonezilla, whichScreenshot-1 was exceedingly easy.  Now, to expand the root partition.  This is blivet-gui, which is supposed to be the new partition management tool, not quite out of beta yet.  However, it refuses to do anything to a mounted partition, so it looked like command line tools were going to have to do.  The commands needed will be:  fdisk, lvs, pvcreate, vgs, vgextend, lvextend, mkfs.ext4, and resize2fs.  You can see by the screen shot, that the new drive has been installed with 46.5 GB of free ‘unallocated’ space.  It is this space that I want to use.  😉  The first step is to use the df -h and lvs commands to collect some information that you will need.  Next, break out our old friend fdisk in order to partition and prepare the free space.  #fdisk  /dev/sda in my case.  Then, create another primary partition (3 of 4 allowable).  Screenshot-4After, that is done, change the partition type from Linux to LVM (8e).   Then, we have to create an ext4 filesystem by doing: #mkfs.ext4 /dev/sda3.  Now, all we need to do is to extend the volume group and capture the free space into the logical volume for root.  😉  First, initialize the partition as a physical volume by:  #pvcreate /dev/sda3.  Now, check the volume groups using the command #vgs.  Now, we can extend it.  The command I used was  #vgextend vg_cap /dev/sda3.  Just a couple more commands…. We are almost there!  Next, we extend the logical volume (lv_root) with all the free space of the volume group (vg_cap).  #lvextend -l +100%FREE /dev/vg_cap/lv_root.  Now, to resize the filesystem:  #resize2fs /dev/vg_cap/lv_root.  Finally, verify everything is fine using df-h, lvs, and vgs.  As you can see, lv_root is now 95GB, with 73GB free.  Screenshot-5 Everything is fine, with the only casualty being that blivet-gui doesn’t seem to run any longer, but that’s no big problem since it didn’t really give me any advantage on a mounted filesystem.  Moral of the story:  The TRUE strength of Linux resides in the CLI (Command Line Interface), shell, terminal, or whatever you choose to call it.  Always has and always will.  As a matter of fact, I accomplished all this over SSH, using VNC just for screenshots.  😉


Extending root LVM is the new server priority

Well, since the backup drive started playing nicely and I didn’t have to replace it, extending the root LVM is the new priority, since the system drive is only a 200GB drive, and the / LVM is only 50GB.  Besides the spare 2TB drive, I also bought a 250GB IDE drive in order to expand the root filesystem for a bit of breathing room.

This is the output of df -h and should show the why I need this:  Filesystem Size Used Avail Use% Mounted on
/dev/mapper/vg_cap-lv_root 50G 19G 29G 39% /
/dev/sdb1 1.8T 883G 858G 51% /mnt/storage
/dev/sda1 477M 192M 257M 43% /boot
/dev/mapper/vg_cap-lv_home 128G 33G 90G 27% /home

You see, only 29GB free…..  /home is in better shape, with 90GB free.

Even though, I will probably use command line tools I checked up on system-config-lvm and found that it had basically been abandoned since Fedora 19, and it now resides in the F19 rawhide repository.    GParted is not a solution, since it doesn’t support LVM partitions.  While noblivet-gui-1t included in F20, Fedora announced news of a new partition manager called blivet-gui.  This is a screenshot of it, and you can see that it looks a lot like GParted,  Since it is not included in the Fedora repositories yet, your only option is to add the repos, so that you can install it and the dependencies using yum.  Here is the link so you you may install the F20 or F21 repository….  vtrefny-blivet-gui-fedora-repo  Simply, download the zip, unzip the file and put the proper repo file in the directory /etc/yum.repos.d/ so that yum can properly install blivet-gui.  I really don’t think that I’ll utilize this tool, but rather expand the root LVM using command line tools such as:  lvdisplay, lvs, vgs, vgextend, and resize2fs, but more on that later……