Category Archives: Computer – Linux

Security Camera BASH script to merge Zoneminder events into mp4 videos

The following script is a BASH (Bourne Again Shell) script that will take zoneminder camera events and merge them into mp4 videos that can easily be archived, or viewed.  The script will also ftp the resultant videos to a remote ftp server.

Zoneminder is a bit cumbersome to locate a particular event or time using the mysql events, or the ZM timeline, but this script streamlines that a bit, allowing you to use VLC or whatever and speed it up to ‘scan’ your day’s or week’s events…..

Very easy to configure as everything is set up using variables.  The script will create a directory name of the current date that it’s run under your home directory, or wherever you choose.

I have it set to run as a cron event daily, but you can set it to run weekly or how often you choose by changing the mtime value, and configuring the cron event to match.

Loader Loading...
EAD Logo Taking too long?

Reload Reload document
| Open Open in new tab

Download [4.13 KB]

So as not to fill up the FTP server, I wrote a prune command that will delete those videos older than 60 days.  Also set to run as a cron event on the FTP server.  It will accept the following syntax:

/path.to.prune/prune </directory.path.containing.video.directories/

Loader Loading...
EAD Logo Taking too long?

Reload Reload document
| Open Open in new tab

Download

You will need to strip the .txt from both scripts and set them to chmod 700 and run them under the cron of the proper user.

Server sendmail and icecast info

Well, I just noticed that the podcast and regular blog weren’t sending out email notifications any longer.  Pretty easy to track down.  For some reason, sendmail was not running.  Even easier to fix.  I simply did (as root):

# systemctl start sendmail

Tested the podcast’s php mail function, and all is well.

Something else that I’ve been chewing on for awhile and finally whipped a couple weeks ago.  I wanted my icecast server and IceS streaming source to behave like centovacast, with a ‘live’ mountpoint that ‘takes control’ of the stream…..  All I had to do is add these lines to /etc/icecast.xml:

<mount>
<mount-name>/stream</mount-name>
<fallback-mount>/live</fallback-mount>
<fallback-override>1</fallback-override>
<hidden>1</hidden>
<public>0</public>
</mount>

<mount>
<mount-name>/live</mount-name>
<fallback-mount>/autostream</fallback-mount>
<fallback-override>1</fallback-override>
<hidden>1</hidden>
<public>0</public>
</mount>

<mount>
<mount-name>/autostream</mount-name>
<fallback-override>1</fallback-override>
<hidden>1</hidden>
<public>0</public>
</mount>

Then, I just had to set IceS to send to the autostream mountpoint, instead of stream.  So, now, in absence of live, when you connect to the normal stream mountpoint, you fallback to live, then fallback to autostream.  The fallback-override directive allows a live source to ‘pull back’ listeners connected to the autostream.  😉


Security cameras now running under Fedora Linux (64 bit)

Well, I managed over the past few days to get the security cameras up and running on Fedora 21 Linux 64 bit using Zoneminder.  The cameras were running under WebCamXP under Windows 7 64 bit, but I grew tired of Bill Gates deciding to reboot the server, even though I instructed it not to perform updates.  Microsoft would occasionally decide that it was in my best interest to apply an update automatically, and do a reboot, rather than allowing me to do that.

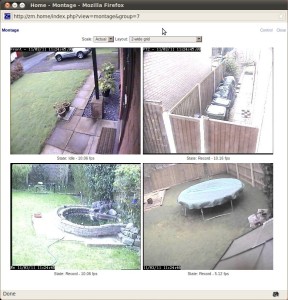
Click here for some screenshots from the zoneminder site of it in action.  I’m already a fan of it since it’s running under Linux and Zoneminder Montageutilizing mysql.  For right now, it’s running ‘in parallel’ to the Win 7 server, to make sure that there aren’t any issues.  In a week or two, I shall finalize the migration.  Another point that would have probably been an issue with running two security servers ‘in parallel’ would have been overloading my wireless network, so I converted everything to ‘wired’ with the two servers in a temporary location to make sure everything is working properly.  I left the wireless access configured for it to use it as a ‘fallback’ in case the wired ethernet fails.  (The picture above is not my actual cameras, btw.)

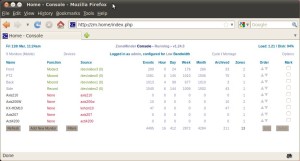
Another upside to this is that the zoneminder console is far less cpu hungry than its windows counterpart.  It’s running at around 75% to Zoneminder Console85% cpu free.  For you hardware geeks out there, it’s running Fedora 21 (64 bit) on a compaq (or HP, if you would rather) machine with an Intel i5 quad core 3.10 Ghz cpu with 8 GB of ram.  (I checked, and got similar numbers on Fedora 21 32 bit with 4GB of ram.) (The picture above is not my actual console, or web address.)  (Yes, I have my console password protected.)  If anybody is inclined, and needs help to set things up, just ask, and I’ll be happy to post a tutorial here.  (Since it’s linux-based, its hardware requirements aren’t that high.)

Server gets larger system drive, and the root LVM extended.

Well, as you all saw in my post on 28 Jan, the root partition only had 29G free, so I felt that an expansion was in order.  The original IDE drive was 200 GB, so only 50 GB was allocated to the root partition.  I ‘cloned’ the existing drive to a new 250GB IDE drive using clonezilla, whichScreenshot-1 was exceedingly easy.  Now, to expand the root partition.  This is blivet-gui, which is supposed to be the new partition management tool, not quite out of beta yet.  However, it refuses to do anything to a mounted partition, so it looked like command line tools were going to have to do.  The commands needed will be:  fdisk, lvs, pvcreate, vgs, vgextend, lvextend, mkfs.ext4, and resize2fs.  You can see by the screen shot, that the new drive has been installed with 46.5 GB of free ‘unallocated’ space.  It is this space that I want to use.  😉  The first step is to use the df -h and lvs commands to collect some information that you will need.  Next, break out our old friend fdisk in order to partition and prepare the free space.  #fdisk  /dev/sda in my case.  Then, create another primary partition (3 of 4 allowable).  Screenshot-4After, that is done, change the partition type from Linux to LVM (8e).   Then, we have to create an ext4 filesystem by doing: #mkfs.ext4 /dev/sda3.  Now, all we need to do is to extend the volume group and capture the free space into the logical volume for root.  😉  First, initialize the partition as a physical volume by:  #pvcreate /dev/sda3.  Now, check the volume groups using the command #vgs.  Now, we can extend it.  The command I used was  #vgextend vg_cap /dev/sda3.  Just a couple more commands…. We are almost there!  Next, we extend the logical volume (lv_root) with all the free space of the volume group (vg_cap).  #lvextend -l +100%FREE /dev/vg_cap/lv_root.  Now, to resize the filesystem:  #resize2fs /dev/vg_cap/lv_root.  Finally, verify everything is fine using df-h, lvs, and vgs.  As you can see, lv_root is now 95GB, with 73GB free.  Screenshot-5 Everything is fine, with the only casualty being that blivet-gui doesn’t seem to run any longer, but that’s no big problem since it didn’t really give me any advantage on a mounted filesystem.  Moral of the story:  The TRUE strength of Linux resides in the CLI (Command Line Interface), shell, terminal, or whatever you choose to call it.  Always has and always will.  As a matter of fact, I accomplished all this over SSH, using VNC just for screenshots.  😉