Category Archives: Computer – Linux

Server OS drive ‘imaged’ today.

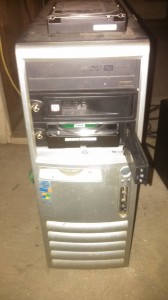
Today, I imaged the server’s OS drive, since the last image (not backup, but ‘image’) that I saved was a year ago.  Before I was able to boot the system with the Clonezilla boot disk, I had to replace the DVD Rom drive, since it was dead.  After that was finished, I upgraded the kernel and kernel headers.  The length of time the clonezilla image process took reminded me that I need to cut the size of / and /home.  😀  So, I’m starting on that one now.

Once that is finished to my satisfaction, I shall upgrade the Fedora 13 to 14 initially, and if things go well, to 15 and/or 16.  (I would like to get to at least 17 where the directories /bin, /sbin are ‘merged’ into /usr/bin/ and /usr/sbin/ for compatibility.)

Until I return to work on 8 Sep 2014, I would expect that there might be extended periods of server ‘downtime’ as I have decided that the best way to upgrade this legacy Fedora install would be from DVD media.

I will try to reduce inconvenience, but it may be noticeable.  😉

Server upgrade and cloning has begun!

Server

This morning, I removed the backup drive, installed the new drive in the hot swap bay, and started prepping the drive at about 0900 Hrs.  Instead of using fdisk to partition the disk, I used another tool that is a bit easier, more flexible, and should be included in most every modern Linux distributions:  gparted.

So, as root user, I did the following:

# parted /dev/sdc mkpart primary 1m 100%
Information: You may need to update /etc/fstab.

# parted /dev/sdc “unit b print”
Model: ATA ST2000DM001-1CH1 (scsi)
Disk /dev/sdc: 2000398934016B
Sector size (logical/physical): 512B/4096B
Partition Table: msdos

Number  Start             End                 Size                 Type     File system  Flags
1      1048576B  2000398843903B  2000397795328B   primary

Notice that the start is at the 1 Meg spot, and not at 63, the way fdisk defaults.  This ‘aligns’ the partition structure and should result in higher performance.  Now, it was time to create the filesystem.  Here is the output:

# mkfs.ext4 /dev/sdc1
mke2fs 1.41.10 (10-Feb-2009)
Filesystem label=
OS type: Linux
Block size=4096 (log=2)
Fragment size=4096 (log=2)
Stride=1 blocks, Stripe width=0 blocks
122101760 inodes, 488378368 blocks
24418918 blocks (5.00%) reserved for the super user
First data block=0
Maximum filesystem blocks=0
14905 block groups
32768 blocks per group, 32768 fragments per group
8192 inodes per group
Superblock backups stored on blocks:
32768, 98304, 163840, 229376, 294912, 819200, 884736, 1605632, 2654208,
4096000, 7962624, 11239424, 20480000, 23887872, 71663616, 78675968,
102400000, 214990848

Writing inode tables: done
Creating journal (32768 blocks): done
Writing superblocks and filesystem accounting information: done

This filesystem will be automatically checked every 35 mounts or
180 days, whichever comes first.  Use tune2fs -c or -i to override.

By now, it was 0915 Hrs, and it was time to mount the new drive and start ‘cloning’ as before mentioned using ‘cp -rp’.

It’s now about 1015 Hrs, and the cp process has run an hour or so, and I see that it’s clipping right along at about a rate of 225GB/hour.  😉

# df -h

/dev/sdb1             917G  764G  107G  88% /mnt/storage
/dev/sdc1             1.8T  224G  1.5T  13% /mnt/new

At this rate, I don’t expect it to take more than a couple more hours.  Then, I will have to do the ‘disk swap dance’.  😉

Cloning directories and files.

Well, now that I’ve gone over preparing the new 2TB /dev/sdc1, I will go over cloning the contents of the 1TB /dev/sdb1 to /dev/sdc1.  It is easy, since /dev/sdb1 (/mnt/storage/) has just one large partition.  So, I wish to copy those directories and files over to /dev/sdc1 (/mnt/disk1), while preserving ownership, permissions, and filestamps.

First you MUST become root user.

$ cp -rp /mnt/storage/* /mnt/disk1/

It means: copy everything recursively, while preserving file attributes from /mnt/storage/ to /mnt/disk1/.  😉

Since the 1TB drive is fairly full, this will take some time to complete, but the nice part is that the server’s operation isn’t interrupted.  After the task completes, I shall unmount both drives.  Then, remove the 1TB drive, move the 2TB drive from its present bay to the (now) empty  bay, and reinstall the backup drive into its original bay.  Remount the drives, and everything is back in order.  Since the stream is ‘using’ the 1TB drive, I’ll have to temporarily stop it, and restart it when the swap is complete, as well as send a broadcast message to any users that are on the system using ftp or shell processes.

$ wall The /mnt/storage/ drive will be unavailable in five minutes.

This will send the message listed after ‘wall’ to all terminals on the system.

If you have users that ignore the broadcast, you will have to kick them out, but I will cover that at a later date, if I remember.

Impending hard drive upgrade and howto for the server.

Well, this weekend, I am planning on upgrading the 1TB storage drive on the server to a 2TB drive.  I now already have a 2TB backup drive, and the storage and backup drives are in ‘hot swap’ SATA bays, so it will be fairly easy…. So, I thought I would go over the steps required.  (There aren’t that many.)

First, become root user!

Step #1 : Partition the new disk using fdisk command

Following command will list all detected hard disks:

# fdisk -l | grep '^Disk'

Output:

Disk /dev/sda: 200.0 GB, 200049647616 bytes
Disk identifier: 0xe88de88d
Disk /dev/sdc: 2000.4 GB, 2000398934016 bytes
Disk identifier: 0xa982b1a3
Disk /dev/sdb: 1000.2 GB, 1000204886016 bytes
Disk identifier: 0x5f09e44e

You may see a few lines like /dev/dm-x: .  I have snipped them out as they are from LVM and of no concern. The disk identifier lines can also be ignored.

To partition the disk – /dev/sdc, enter:

# fdisk /dev/sdc

The basic fdisk commands you need are:

  • m – print help
  • p – print the partition table
  • n – create a new partition
  • d – delete a partition
  • q – quit without saving changes
  • w – write the new partition table and exit

Step#2 : Format the new disk using mkfs.ext4 command

To format Linux partitions using ext2fs on the new disk:

# mkfs.ext4 /dev/sdc1

(I chose the ext4 filesystem, because it’s a journaling filesystem.)

Step#3 : Mount the new disk using mount command

First create a mount point /disk1 and use mount command to mount /dev/sdc1, enter:

# mkdir /mnt/disk1
# mount /dev/sdc1 /mnt/disk1
# df -H

(I will create /mnt/disk1 as a temporary ‘landing zone’,  since I shall be ‘cloning’ /dev/sdb1 to /dev/sdc1 —  I will go over that easy command in the next post covering this.)

Step#4 : Update /etc/fstab file

Open /etc/fstab file, enter:

# nano /etc/fstab

Append as follows:

/dev/sdb1  /mnt/disk1   ext4   defaults    1 2

Save and close the file.

(You can use vi instead of nano, but I prefer the feel of nano as it’s almost identical to pico.  Guess I’ve dated myself, heh)

I will cover the directory and file cloning in a day or so.